Solutions to Exercises: Learning JQuery – Chapter 3 Handling Events

My solutions to exercises found in Chapter 3 Handling Events of Learning jQuery 4th Edition by Chaffer and Swedberg.

  1. When Charles Dickens is clicked, apply the selected style to it.
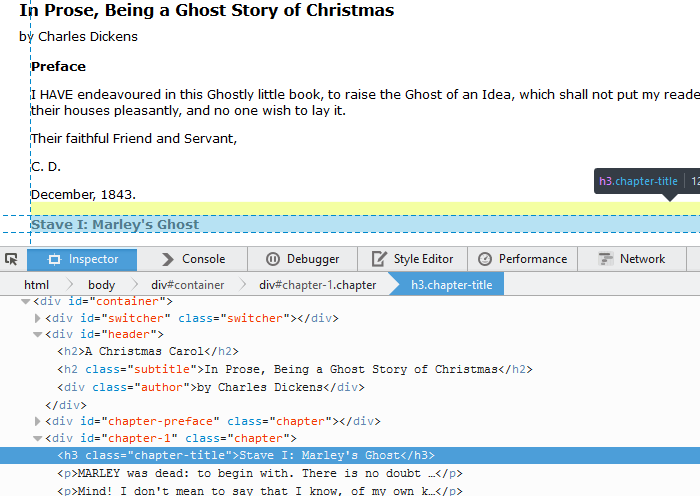
    $('.author').click(function() { $(this).toggleClass('selected') })
  2. When a chapter title (<h3 class=”chapter-title”>) is double-clicked, toggle the visibility of the chapter text.
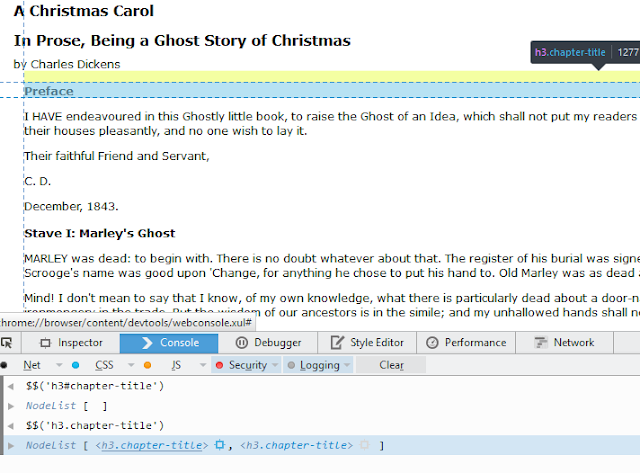
    $('.chapter-title').click(function() {
    	$(this).nextAll('p').toggleClass('hidden');
    })
  3. When the user presses the right arrow key, cycle to the next body class. The key code for the right arrow key is 39.
    var setBodyClass = function() {
    	var body = $('body');
    	if (body.hasClass('narrow')) {
    		body.removeClass().addClass('large');
    	}
    	else if (body.hasClass('large')) {
    		body.removeClass();
    	}
    	else {
    		body.removeClass().addClass('narrow');
    	}
    };
    	
    $(document).keyup(function(event) {
    	if (event.which == 39) {
    		setBodyClass();
    	}
    })
    
  4. Challenge: Use the console.log() function to log the coordinates of the mouse as it moves across any paragraph. (Note: console.log() displays its results via the Firebug extension for Firefox, Safari’s Web Inspector, or the Developer Tools in Chrome or Internet Explorer).
    Not sure why this is a challenge question. The answer is in the jquery documentation for mouseover

    $('p').mouseover(function(event) {
    	console.log(event.pageX + " " + event.pageY);
    });
    
  5. Challenge: Use .mousedown() and .mouseup() to track mouse events anywhere on the page. If the mouse button is released above where it was pressed, add the hidden class to all paragraphs. If it is released below where it was pressed, remove the hidden class from all paragraphs.
    var down = -1;
    $(document).mousedown(function(event) {
    	down = event.pageY;
    });
    $(document).mouseup(function(event) {
    	if (down != -1) {
    		var up = event.pageY;
    		if (up < down) {
    			$('p').addClass('hidden');
    		}
    		else if (up > down) {
    			$('p').removeClass('hidden');
    		}
    	}
    });
    

Testing CSS selectors in Firefox

CSS selectors are used frequently when writing jquery code. Recently I discovered Firefox provides a handy syntax for testing CSS selectors:

$$('CSS selector')

In the screenshot below, I’m looking at an <h3> element with the class ‘chapter-title’ using Firefox’s web developer tools.

firefox inspector

To test if the selector ‘h3.chapter-title’ returns the expected elements, enter $$('h3.chapter-title') in the console. The command returns a nodelist with two elements, one for each match. Hovering over the individual element in the console will highlight the corresponding element in the page.

testing css selector with $$

Solutions to Exercises: Learning JQuery – Chapter 2 Selecting Elements

After finishing the excellent Object Oriented Javascript, I’m now working my way through Learning jQuery 4th Edition by Chaffer and Swedberg. Here’s my solution to exercises found in the end of Chapter 2 Selecting Elements.

  1. Add a class of special to all of the <li> elements at the second level of the nested list.
    $('#selected-plays ul li').addClass('special')
  2. Add a class of year to all the table cells in the third column of a table.
    $('tr').find('td:eq(2)').addClass('year')
  3. Add the class special to the first table row that has the word Tragedy
    in it.

    $('td:contains(Tragedy)').first().parent().addClass('special')
  4. Challenge: Select all the list items (<li>s) containing
    a link (<a>). Add the class afterlink to the sibling list items that follow
    the ones selected.

    $('li a').not('[href^="mailto:"]').parent().nextAll().addClass('afterlink')
  5. Challenge: Add the class tragedy to the closest ancestor <ul> of
    any .pdf link.

    $('a[href$=".pdf"]').closest('ul').addClass('tragedy')

Node.js and learning JavaScript

I’m slowly working my way through Object-Oriented JavaScript by Stefan and Sharma. All the tutorials I’ve seen online suggest using the web console in browsers for typing and testing code. While this method is fine for one or two lines of code, it is not the most efficient way for larger programs.

This is where node.js comes in handy. According to its website, it is a platform built on Chrome’s JavaScript runtime for easily building fast, scalable network applications. For a JavaScript newbie, it means you can write your code in a text editor and run it outside a browser environment. All you have to do is

  1. open the node.js command prompt (via the windows menu)
  2. change to the directory where the JavaScript program is located
  3. type node filename.js